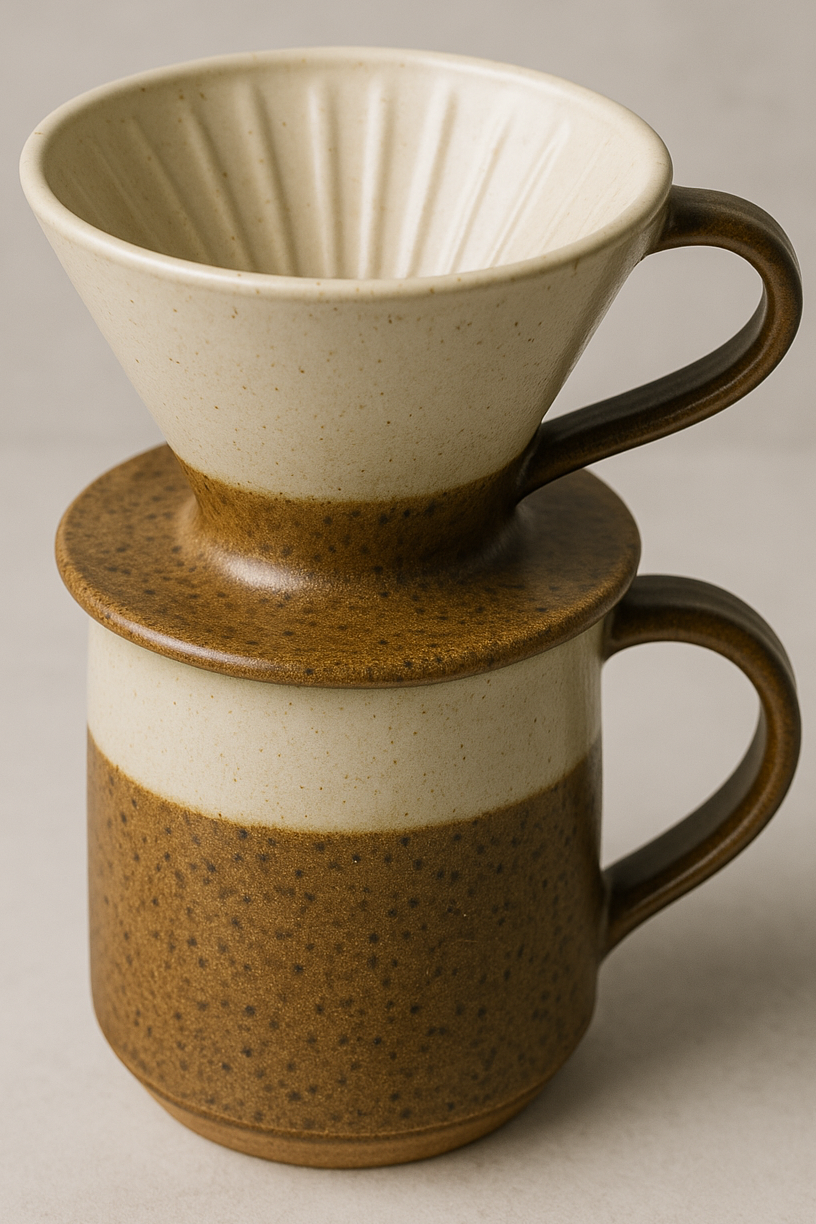
Coffee pour-overs have become a popular way to brew a perfect cup of coffee, and making your own ceramic pour-over on the pottery wheel adds a personal touch to this brewing method. Whether you’re a beginner or experienced ceramicist, crafting a custom pour-over is a fun and practical project that allows you to create functional and beautiful pottery. In this guide, we’ll take you through the step-by-step process of throwing a ceramic coffee pour-over on the wheel.
What is a Coffee Pour-Over?
A coffee pour-over is a manual brewing device used to make pour-over coffee. The ceramic pour-over sits on top of a coffee mug or carafe, holding the coffee filter while water is poured over the grounds. The slow brewing process allows for better flavor extraction, resulting in a rich and flavorful cup of coffee.
By making your own ceramic pour-over, you can control the size, shape, and aesthetic, creating a one-of-a-kind piece that is both functional and beautiful.
Materials Needed to Throw a Coffee Pour-Over
Before you begin, gather the following materials:
- Pottery Wheel
- Clay (Stoneware or Porcelain)
- Throwing Tools (rib, needle tool, wire cutter, sponge)
- Bat or Wheel Head
- Trimming Tools
- Calipers (for measuring dimensions)
- Kiln (for firing)
- Glaze (food-safe glaze for the finished product)
Step-by-Step Guide to Throwing a Ceramic Coffee Pour-Over
1. Prepare Your Clay
Start by wedging your clay to remove any air bubbles and ensure a uniform texture. A stoneware or porcelain clay body is ideal for functional pieces like coffee pour-overs. For this project, you’ll need around 1 to 2 pounds of clay.
2. Center the Clay on the Wheel
Place the wedged clay on your pottery wheel and center it using water and your hands. Centering is crucial for throwing symmetrical forms. Use firm pressure with both hands to guide the clay into a stable, centered mound.
3. Open the Clay
Once the clay is centered, open it by pressing your thumbs into the center and widening the hole. Aim for the base of the pour-over to be about ½ inch thick. This will provide a stable foundation for the piece and ensure it’s durable enough to withstand daily use.
4. Pull the Walls
With the base established, start pulling up the walls of the pour-over. Use gentle, even pressure to pull the clay upward and outward, forming the cone shape typical of pour-over devices. Aim for a height of around 3 to 4 inches, with a slightly flared opening at the top to accommodate a standard coffee filter.
- Pro Tip: Keep the walls around ¼ inch thick for a sturdy yet lightweight pour-over.
5. Shape the Spout
To allow the coffee to flow through, you’ll need to create a small hole or spout at the bottom of the cone. Use a needle tool to carefully puncture the center of the base and widen it slightly with your fingers or a trimming tool. The hole should be large enough for liquid to flow through, but not too wide—typically around ¼ inch in diameter.
6. Trim the Base
After throwing the shape, let the pour-over dry to a leather-hard state before trimming. Once it’s firm enough to handle, place it back on the wheel upside down and trim the bottom to remove excess clay and refine the shape. Use a loop tool or other trimming tools to give the base a clean finish.
7. Add Ridges for the Filter
To improve functionality, you can add small ridges on the interior walls of the cone. These ridges help hold the coffee filter in place and allow air to flow, preventing the filter from sticking to the sides. Use a trimming tool or your fingers to gently carve vertical ridges along the inside.
8. Create a Base or Handle (Optional)
If desired, you can add a handle or create a foot on the pour-over. Adding a handle makes it easier to lift, while a raised foot can add stability. If adding a handle, score and slip the attachment and blend it into the body.
Finishing and Glazing the Coffee Pour-Over
9. Dry and Bisque Fire
Let the finished pour-over dry slowly and evenly to avoid cracking. Once it’s bone dry, bisque fire it in the kiln. This initial firing prepares the piece for glazing.
10. Glaze the Pour-Over
After bisque firing, apply a food-safe glaze to the pour-over. Choose a glaze that complements your design while ensuring it’s durable enough for daily use. You can dip, pour, or brush the glaze onto the piece, making sure to coat both the interior and exterior.
11. Glaze Firing
Fire the glazed pour-over in the kiln according to the glaze’s specifications. Ensure the temperature reaches the correct cone for your clay and glaze. Once fired, your ceramic coffee pour-over is ready to use!
Pro Tips for Throwing a Coffee Pour-Over
- Choose the Right Clay: Stoneware or porcelain are ideal for functional pottery like pour-overs, as they are durable and can withstand heat and daily use.
- Consistent Thickness: Keep the walls and base of the pour-over consistent to avoid uneven drying or cracking during firing.
- Experiment with Design: Customize your pour-over with unique glazes, colors, and textures to create a one-of-a-kind piece that reflects your personal style.
- Test the Flow: Before firing, check the size of the spout to ensure it allows for a steady, even flow of coffee.
Conclusion
Throwing your own ceramic coffee pour-over is a rewarding project that combines creativity with functionality. By following these steps, you can craft a custom pour-over that not only enhances your coffee brewing experience but also showcases your pottery skills. Whether you’re new to pottery or looking to expand your collection of handmade ceramic pieces, making a coffee pour-over is a great way to merge artistry with everyday utility.